Top_VitiAutFil

Self Threading Screws
Menu: Top > Library > Bolts and Nuts > Self Threading Screws
With TOP the user disposes of a series of standard self threading screws that can be managed using a simple and intuitive dialogue box. The manageable parameters are the diameter, the length and the type of the screws end.
As for all standard libraries, it is possible to create a part and insert automatically in the material’s slip the parts used. The code of the screw’s part is customizable by editing the value in the appropriate space. If the box is left empty, the code will be created automatically. Click on Codified Menu and a dialogue box appears and allows the user to select a specific screw between all those codified.
- What
- Allows to draw the self-tapping and self-perforating screws in lateral or top view.
- Why
- To insert in a drawing a self-tapping or self-perforating screw conform to UNI standards, and possibility to create different parts and manage the elements in the material’s BOM.
- How
- In order to easily and rapidly handle the drawing of the screws, a dialogue box is available which describes the main parameters of the screw on which you can act, as well as a window displaying the screw’s preview. The dialogue-box opened with the command Top_VitiAutFil is divided in two main sectors, as described in the image below.
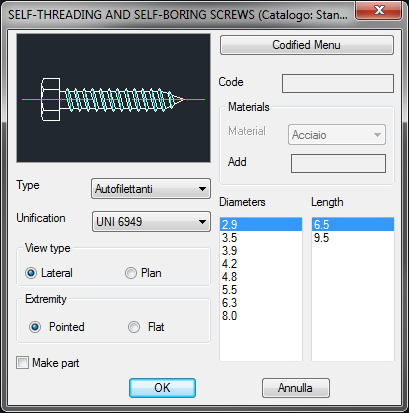
On the top left is displayed, as for most libraries, the preview of the screw according the type of view, modifiable clicking on the image, and the type of screw.
Under the dialogue’s left side are displayed two drop-down menus to select the type of screw and the standards.
Under is possible to change the object’s type of view and set the screw’s type of end. At the bottom of the left section is displayed a command to create the part of the object inserted in the library.
On the right side is displayed the button to switch from the main menu to the menu Codify, and viceversa.
Under is displayed the dialogue-box to insert the code and to insert the material, including the selection command At the bottom right are displayed two lists with the data on the screw’s diameter and length.
Once selected all options, set the insertion point and angle and press OK to insert the object in the drawing
Example 154. Draw Self Threading Screws
(Dialogue...) Insertion Point: Insertion Angle: